Projects: Staging Environment with Netlify

Netlify
Achievement unlocked! I know how to work with staging environments in Netlify now.
Specifically, I have just completed the setup and testing of such environment for this Jekyll-based blog.
It’s been a while since I documented a Unix Tutorial Project, too. I’ve been coming back to this idea for a few months now, first not being sure how to use different branches in GitHub, then not quite understanding how to work with different branches in the Sublime Text 4 and lately trying to figure out how to make sure I don’t accidentally publish a whole second website that would compete with the original website - duplicated content is not good for Google rankings.
Why You Might Need a Staging Website
The primary reason is having ability to push and test your website changes online but not on the production website. Yes, most of my development is done using local Jekyll setup on each of my macOS systems, but sometimes I really need to show some content to a friend or colleague - staging website is perfect for such an idea.
IMPORTANT: If you’re working on relatively sensitive content - you probably want to protect your non-primary website environment with an htpasswd or something similar.
Secondary reason for having a staging website is that it tests not just local copy of your blog but also the whole deployment process. In my case, this means GitHub pushes update to Netlify where the whole website is regenerated. If there are any issues with this process, I’ll catch and fix them before and possibly even without breaking my primary website.
Configuring a Staging Website
Setup new DNS name
Assuming you want some fancy subdomain name like test.website.com, you’ll need to create a new DNS entry. Point it to the same hostname you use for your primary Netlify website (it’s just another CNAME entry).
Create new branch on GitHub
I have created staging branch inside the UnixTutorial GitHub repo.
You need to commit something in that branch before Netlify registers that you have multiple branches in your process.
Once that happens, you’ll see a new option that allows you to configure multiple deploys.
Prevent Your Jekyll Website from Being Indexed
It’s really key to make sure your development blog is not indexed alongside your original website - Google and other search engines may lower your rankings for both live and development websites.
Jekyll has support for multiple environments, like staging or production. So you can add a simple Liquid conditioning that marks non-production pages to be noindex.
REALLY IMPORTANT: default value for a Jekyll environment is “development”, so be sure to sort its configuration first, commit and test as shown below before adding Liquid template change.
The thing is, by default this environment variable is not set. So we must configure it before it starts working. You can do it using netlify.toml configuration file that you should put in the root folder of your website repository.
Mine looks like this right now:
# set JEKYLL_ENV correctly for the development branches
[build.environment]
	JEKYLL_ENV="development"
# set JEKYLL_ENV accordingly if Netlify environment is production
[context.production.environment]
	JEKYLL_ENV="production"
Once you commit these changes and push them to Netlify, go ahead and check the deployment logs.
If configured correctly, netlify.toml will get registered by Netlify builder:
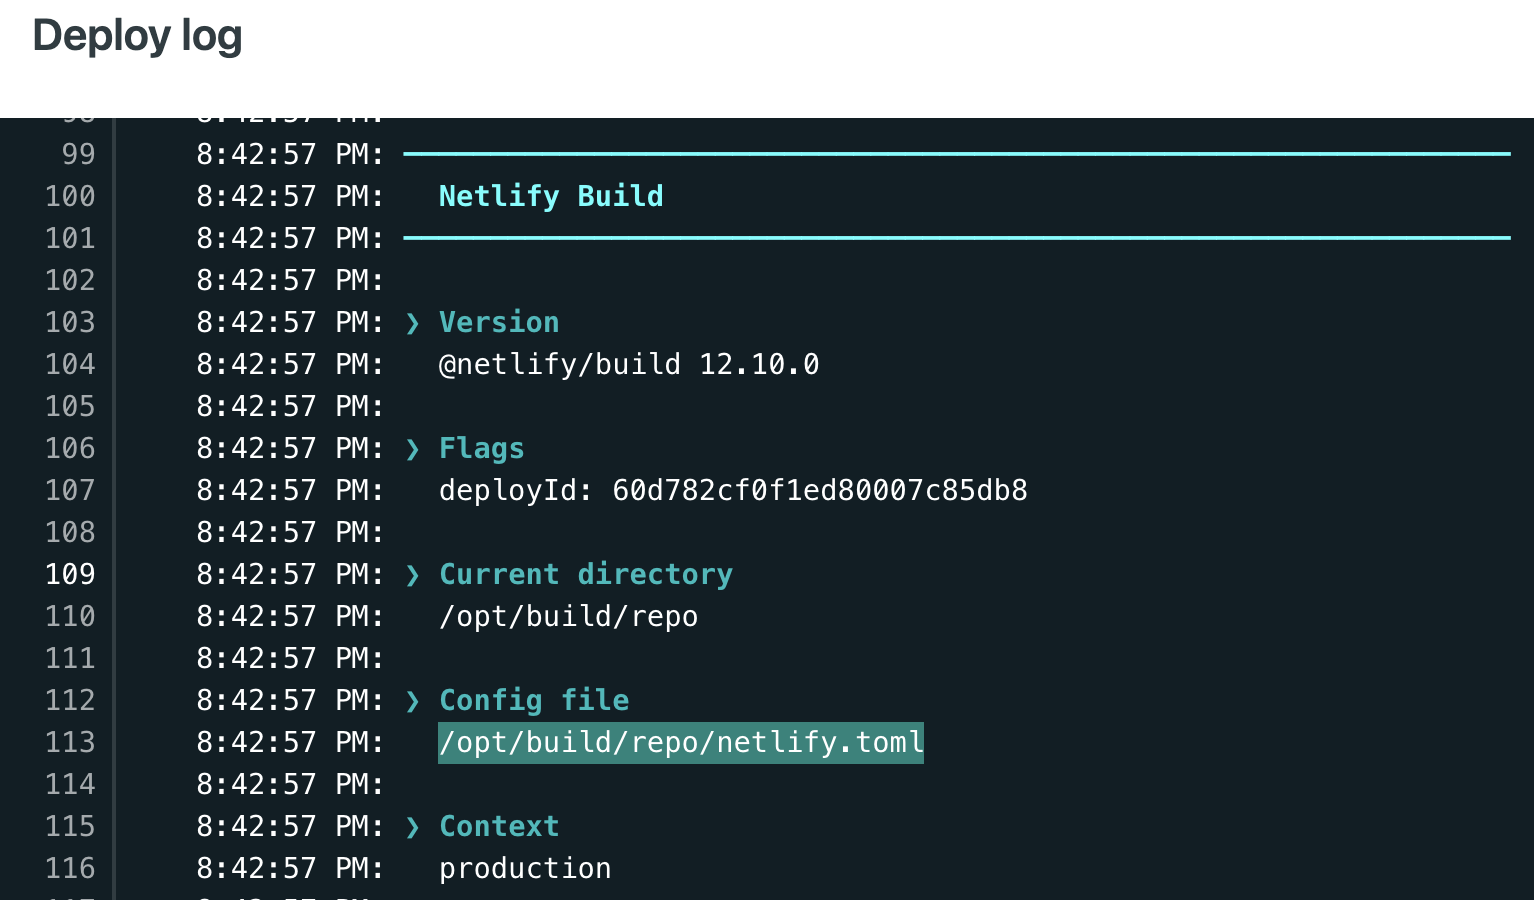 Netlify Detects netlify.toml Correctly
If you misplaced the file or something, you’ll see that Netlify failed to find config file netlify.toml (it says no configuration defined):
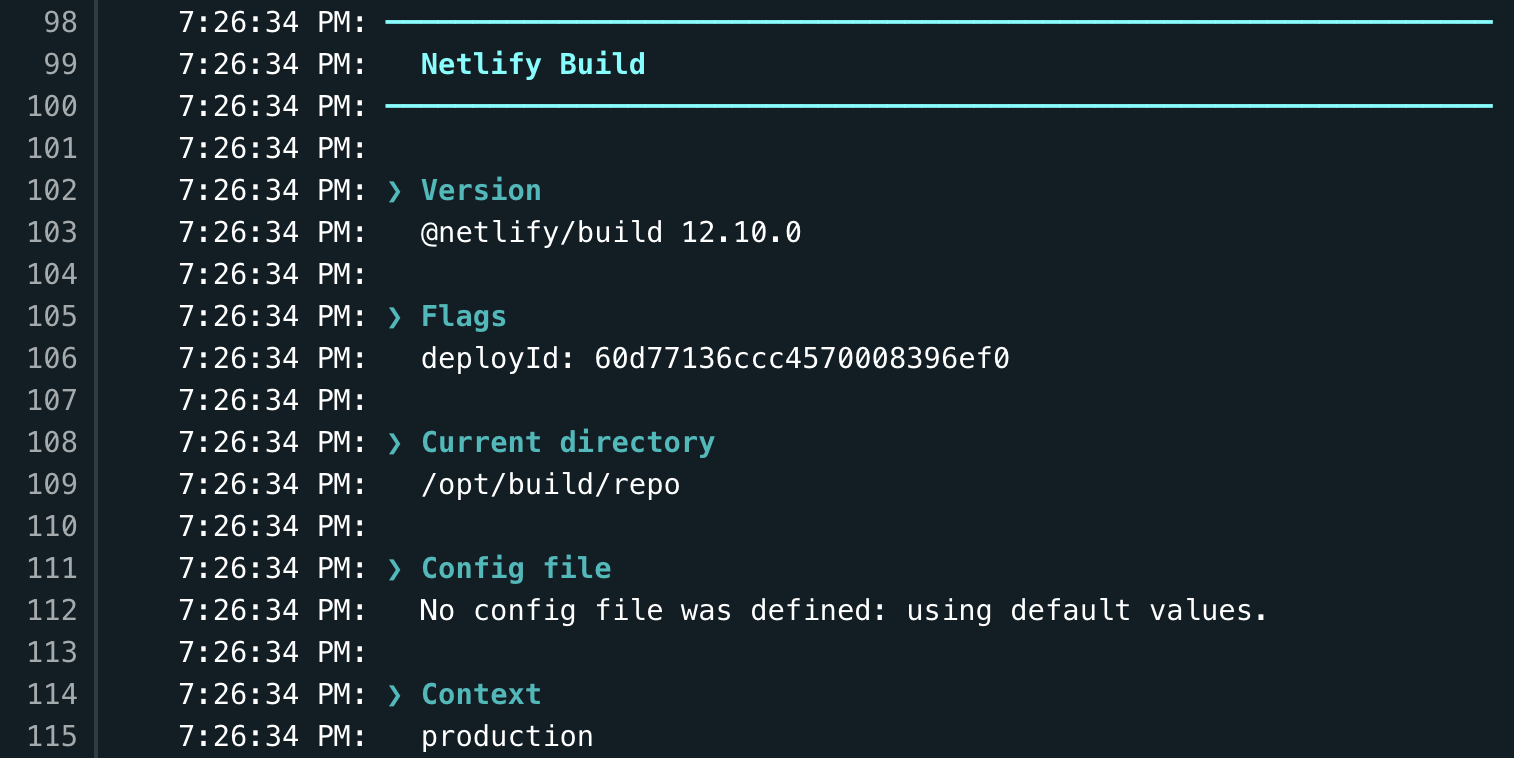 Netlify.toml not Defined
Updating Liquid template to add noindex
Now that it’s done, let’s update the head.yaml template, very top of it:
<head>
  <meta charset='utf-8'>
  <meta http-equiv='X-UA-Compatible' content='IE=edge'>
  {% if jekyll.environment != 'production' %}
  <meta name="robots" content="noindex" />
  {% endif %}
  <meta name='viewport' content='width=device-width, initial-scale=1'>
See the jekyll.environment section? That’s the magic. It checks the JEKYLL_ENV variable that we previously configured and renders each page accordingly.
Deploying to Staging Environment
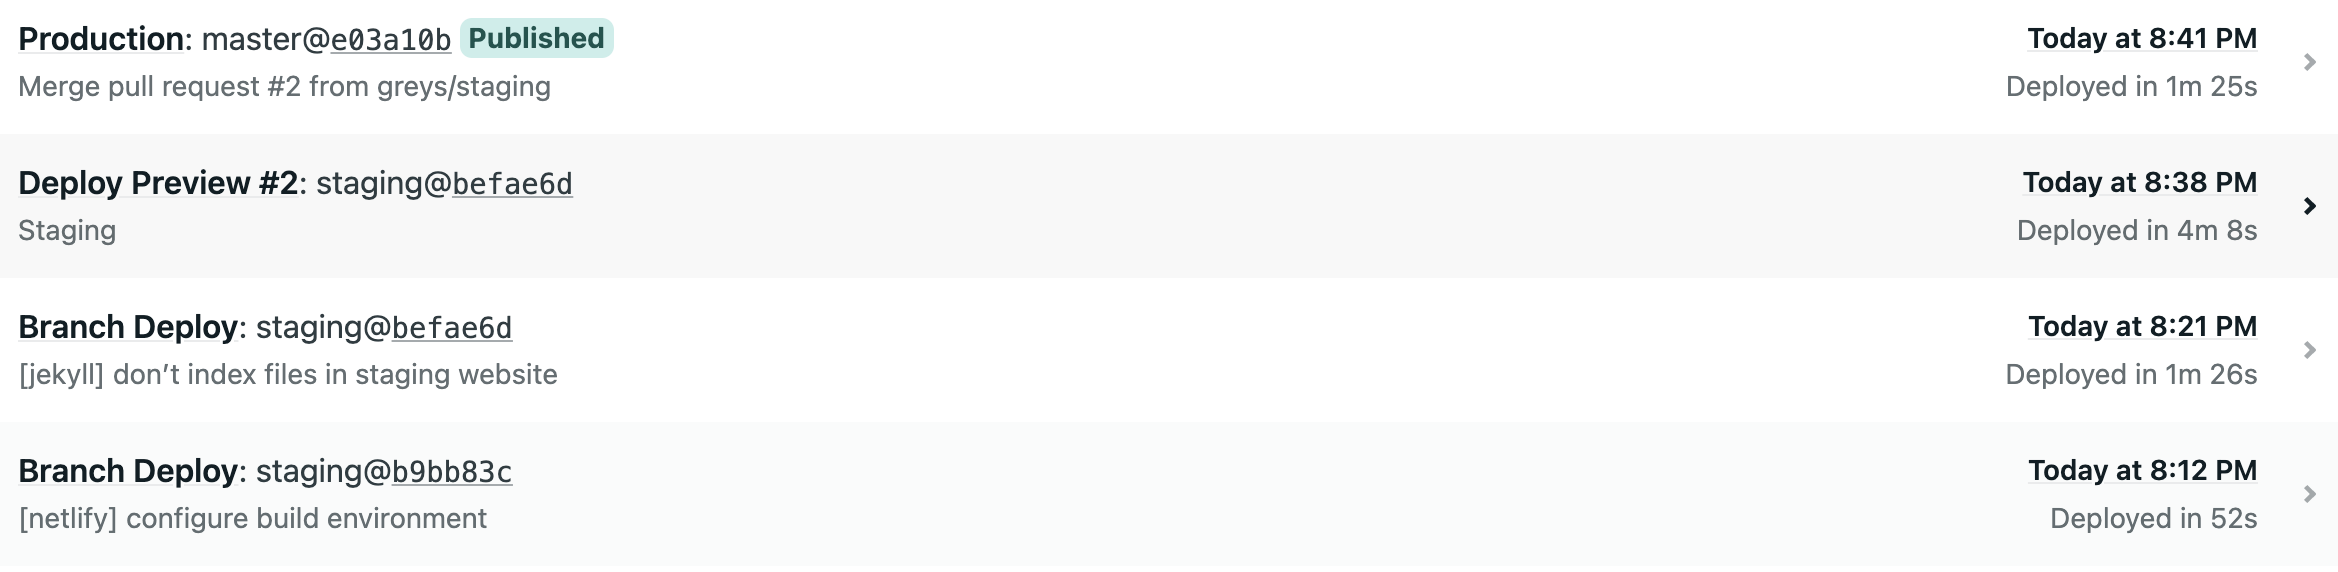
This part is easy! Just make sure you’re editing and committing changes in the staging branch of your website repo. Netlify will pick the commits up and show them as branch deploys. Whenever you merge staging branch into main one, you’ll see a Production deploy:
That’s it! Let me know if you have any questions!